Before installing or renewing an SSL/TLS certificate, you must first generate a Certificate Signing Request (CSR). In Microsoft IIS on Windows Server, the CSR contains essential information such as the common name, organization, and public key that a Certificate Authority (CA) uses to issue your certificate. This step-by-step guide walks you through the process of creating a CSR using IIS Manager, ensuring a smooth certificate deployment.
Before an SSL/TLS certificate can be issued or renewed, you must first generate a Certificate Signing Request (CSR). A CSR contains information about your server and organization, along with the public key that will be included in the certificate.
Follow the steps below to generate a CSR using Microsoft IIS Manager on Windows Server.
Step 1: Open IIS Manager
Launch Internet Information Services (IIS) Manager.
There are multiple ways to open IIS Manager:
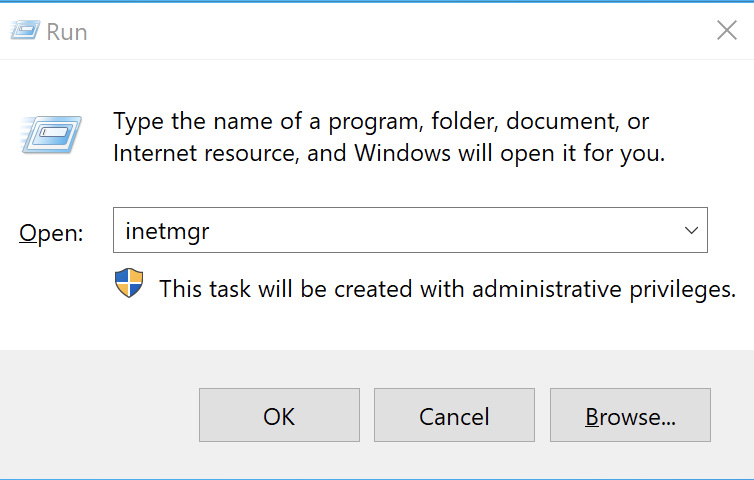
- Open the Run dialog by pressing Windows + R
- Type inetmgr
- Click OK or press Enter
Step 2: Select the Server
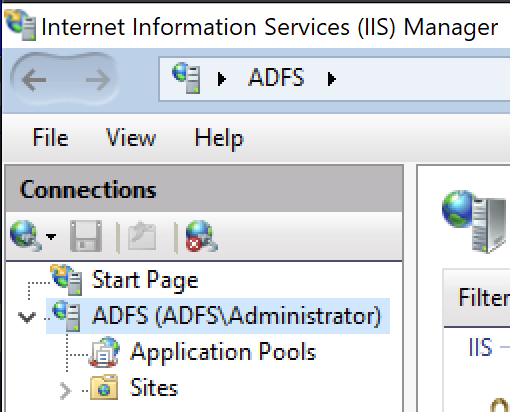
In the Connections pane on the left side, select the server where the SSL certificate will be installed.
This will display the available server-level management features.
Step 3: Open Server Certificates
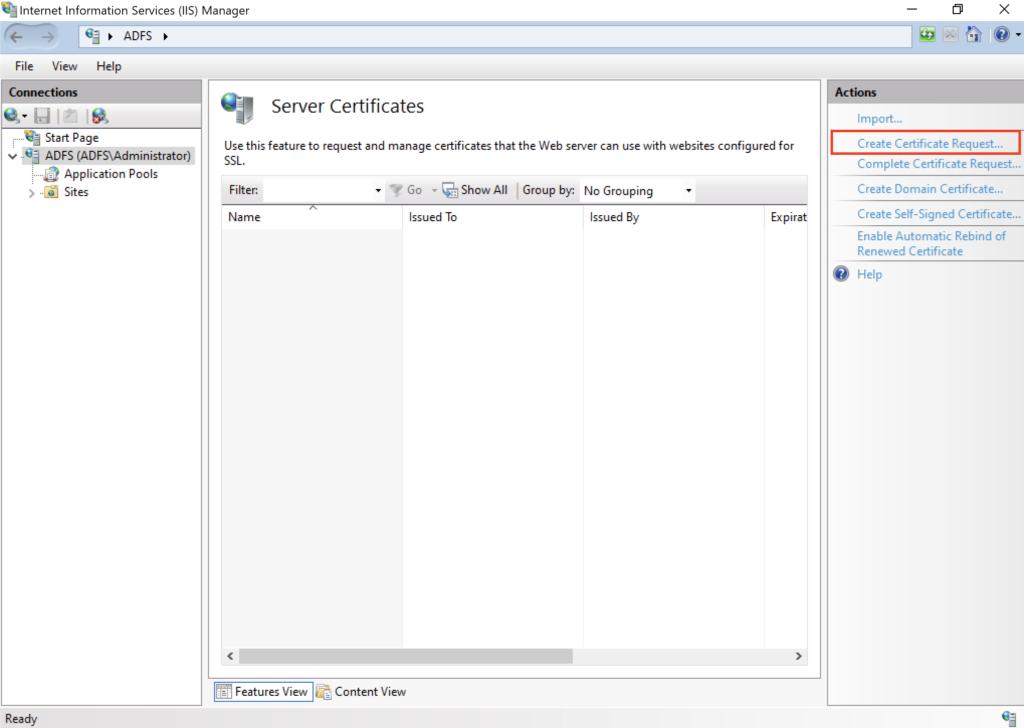
In the center pane, under the IIS section, double-click Server Certificates.
This feature is used to create, import, renew, and manage SSL certificates.

Step 4: Create a Certificate Request
From the Actions pane on the right, click Create Certificate Request…
The Certificate Request wizard will start.
Step 5: Enter Distinguished Name Properties
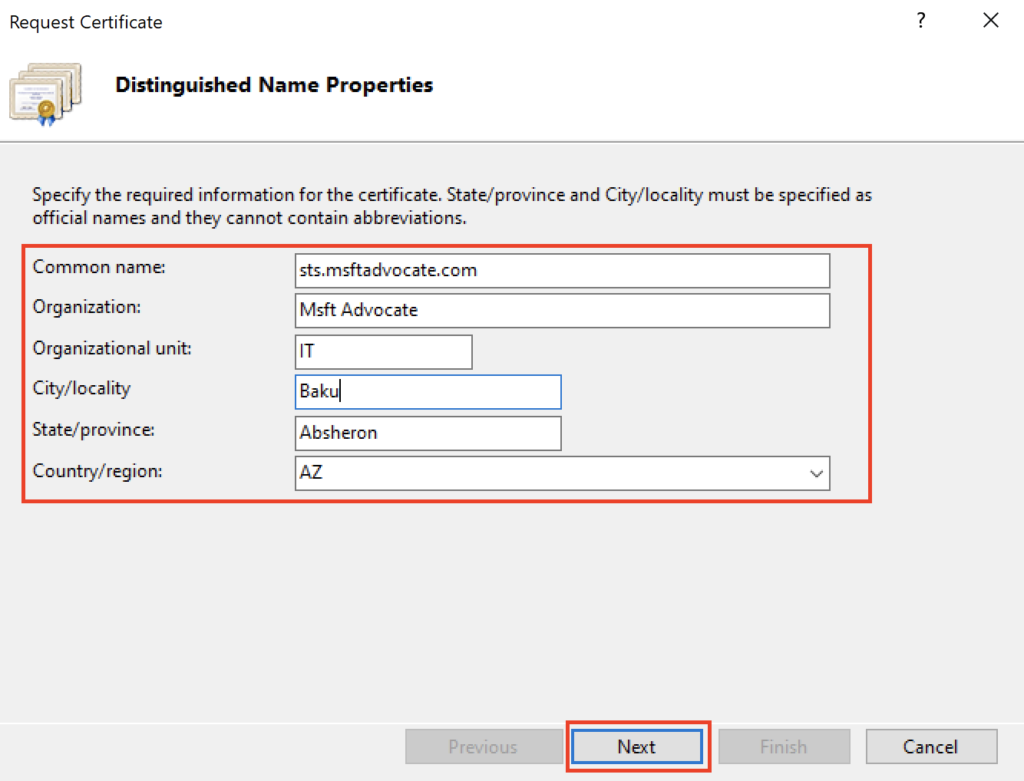
Complete the required fields with your organization’s information.
| Field | Description |
|---|---|
| Common Name | The fully qualified domain name (FQDN) that will be secured, such as www.contoso.com or mail.contoso.com. For wildcard certificates, use *.contoso.com. |
| Organization | Your company’s legal name. |
| Organizational Unit | Department name (optional), such as IT or Security. |
| City/Locality | The city where your organization is located. |
| State/Province | The state or province of your organization. |
| Country/Region | The two-letter country code (for example, US, GB, TR). |
After completing the form, click Next.
Step 6: Configure Cryptographic Service Provider
On the Cryptographic Service Provider Properties page, configure the following settings:
Cryptographic Service Provider
Microsoft RSA SChannel Cryptographic ProviderBit Length
2048Note: A key length of 2048 bits is the industry standard and is recommended for most SSL/TLS certificates.
Click Next to continue.

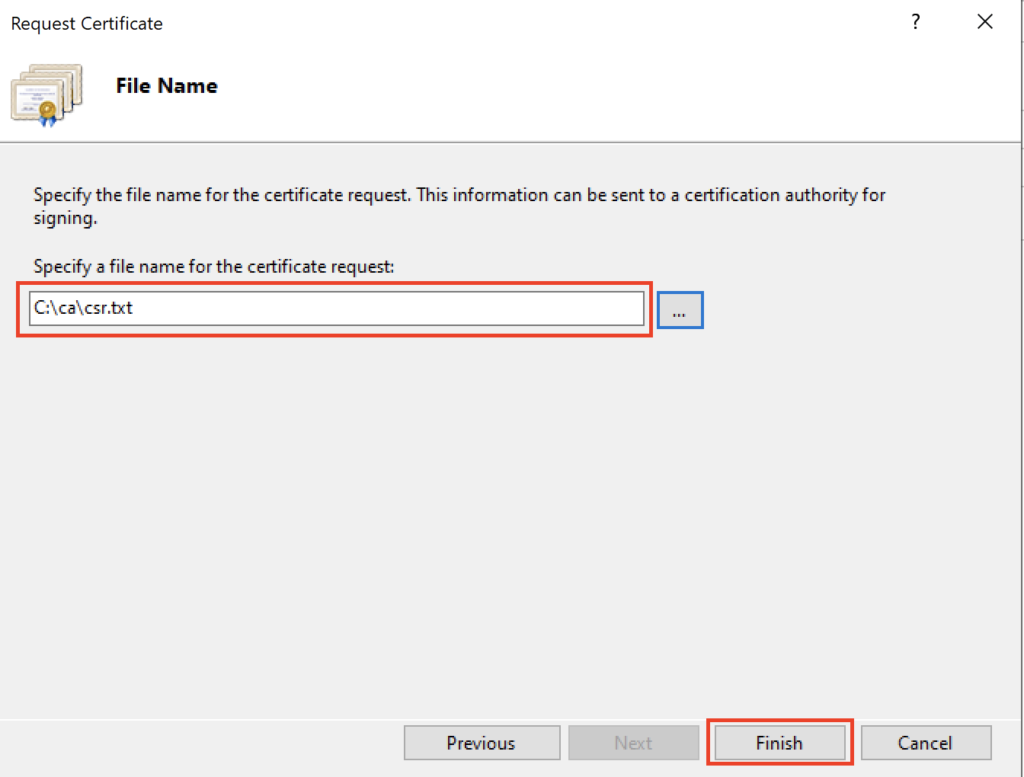
Step 7: Save the CSR File
Choose a location and specify a filename for the Certificate Signing Request.
Example:
C:\ca\csr.txtClick Finish to generate the CSR.
Step 8: Verify the CSR
Open the generated .csr file with a text editor such as Notepad.
A valid CSR will look similar to the following:
-----BEGIN CERTIFICATE REQUEST-----
MIIC...
...
-----END CERTIFICATE REQUEST-----
Copy the entire contents, including the BEGIN and END CERTIFICATE REQUEST lines.

Next Steps
Once the CSR has been generated successfully:
- Submit the CSR to your Certificate Authority (CA).
- Complete the SSL certificate validation process.
- Download the issued certificate.
- Import the certificate into IIS.
- Bind the certificate to your website using HTTPS (port 443).
After completing these steps, your website will be ready to use a trusted SSL/TLS certificate for secure communications.